CCC Architecture
Programs in Architectural Studies at the City Colleges of Chicago
Adding Entourage
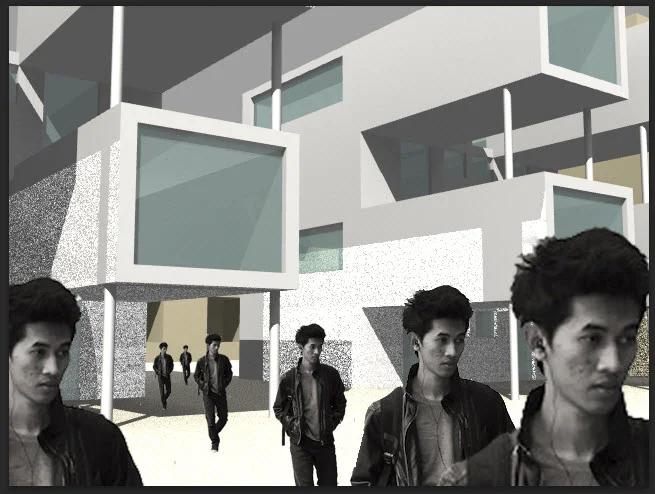
In this exercise you will be adding entourage to one of your images. Entourage are the people and objects that you include in rendered images. The scale figures tell us how big or small the structure is. The model images really have no scale until we see it in context with entourage. These objects are difficult to model, and so they are often added to the image after it has been rendered. This work will be done in Photoshop.
AE.1. Choose one of your rendered images to use for this new assignment. Which one? An image at street level would work well. The image should be one where it appears that the camera view and target is at standing height. An aerial image, for example, would not work well.
AE.2. Open the image in Photoshop. There should be an icon on your desktop. If you don't see it click on the Start icon at the lower left of your screen, click on All Programs and look in the folder called Adobe Design Standard.
AE.3. Save the image as a a Photoshop file. When you choose SaveAs under the File menu, you will be asked to name your file. The native file format is a psd file. Like other software applications Photoshop has layers. If you save in the psd format, your layers will be preserved. If you save as an image file format (like jpg or gif), the file will compress the layers into one layer. You will need to preserve the layers, so save it in the psd format. Name the file as shown below.
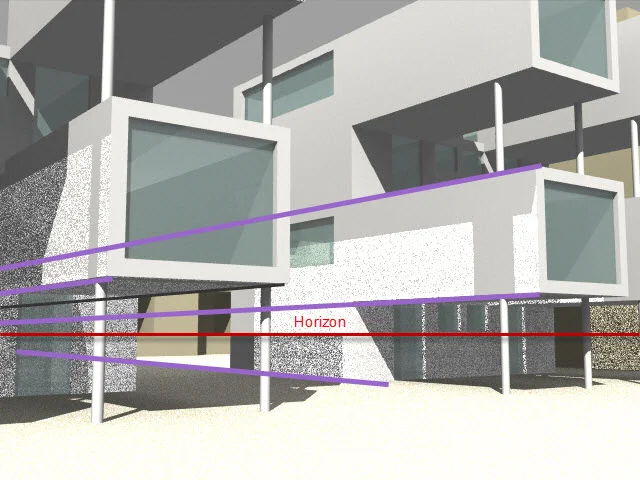
AE.4. In this exercise you will be placing people in the view. The placement and position of will depend on the location of the horizon. To find the horizon extend the edges of planes. Where they converge is the location of the horizon. We'll come back to the rendered image file shortly.
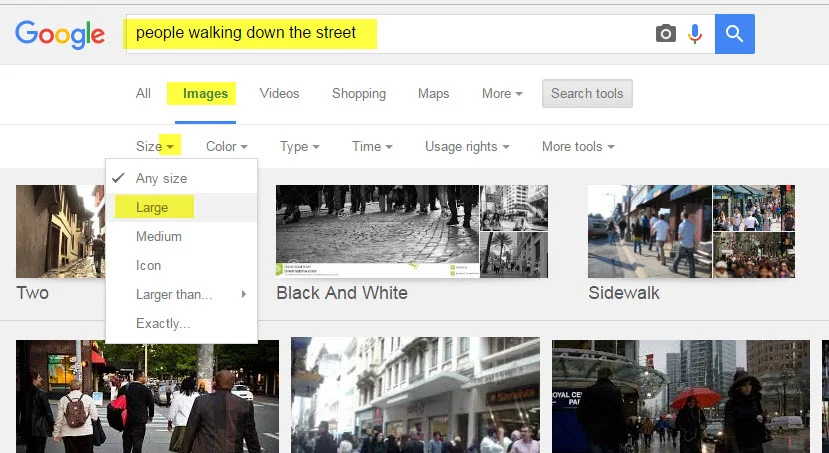
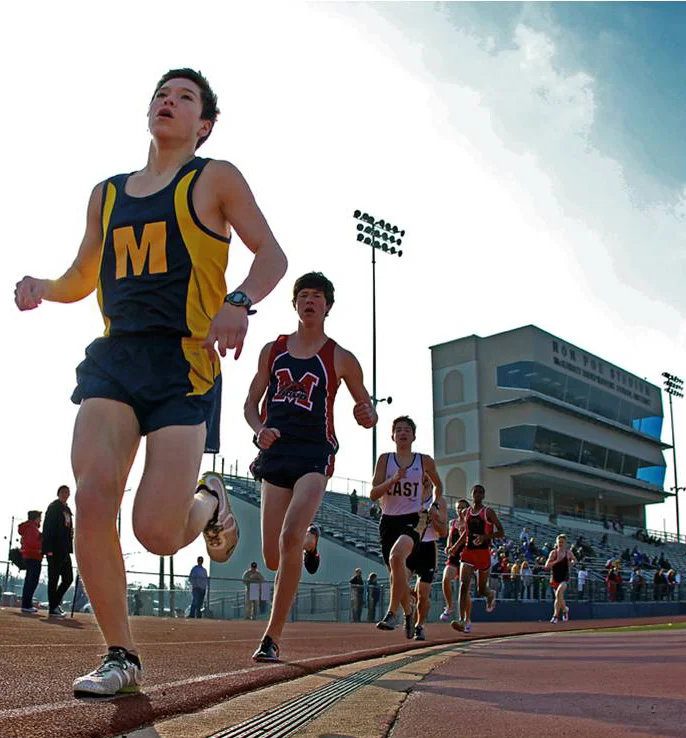
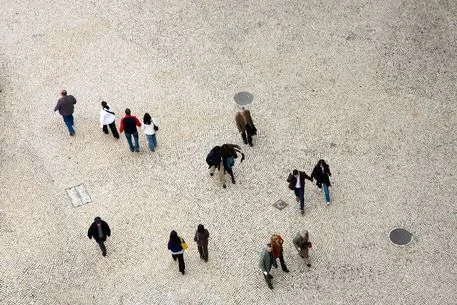
AE.5. Find images of people to serve as entourage on the web. Download the images. You can add search terms as necessary. It is recommended that you look for fairly large image files because they will correspond with the resolution of your renderings. Be specific with your search terms to find people as shown below.
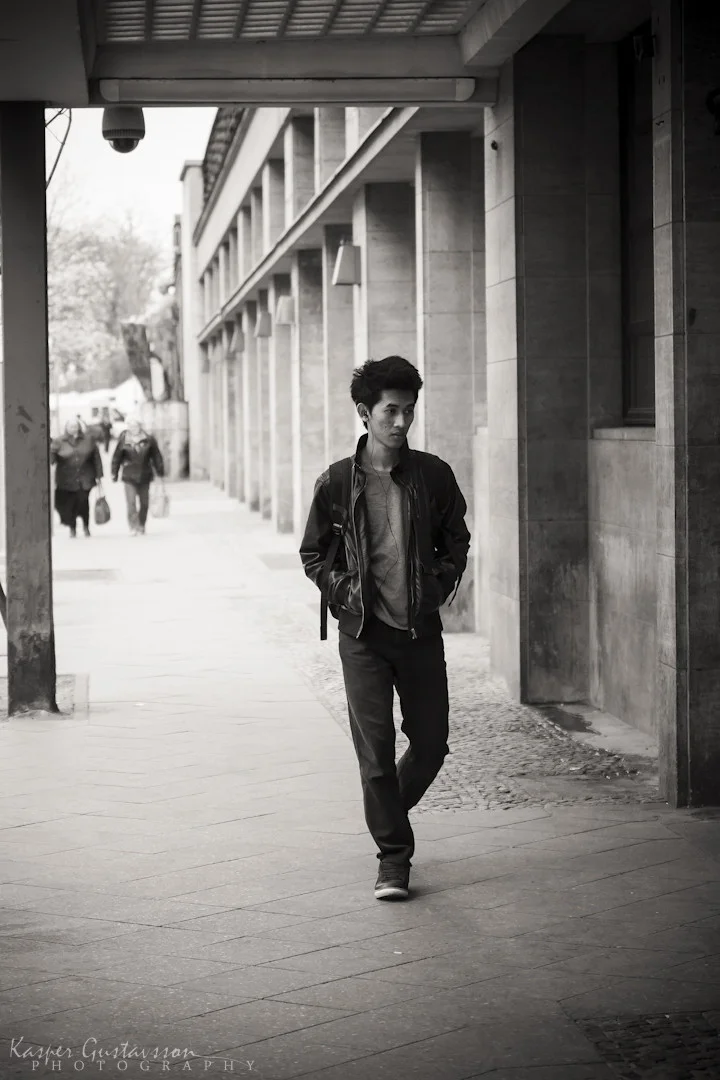
AE.6. How do you choose which image of a person to use? You will need to remove the background around your people. It is best if there is a great deal of contrast (dark figure on light background or light figure on dark background) between the person and the image as shown in the image below. Download the image, and open it in Photoshop.
AE.7. Click on SaveAs. Save the file as a Photoshop file.
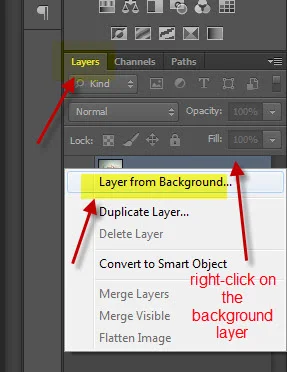
AE.8. When you open an image file in Photoshop, the software places the image in the Background. You'll be removing areas of the background around the person so you will need to convert the background to a layer. Follow the steps shown below to make a layer out of the background.
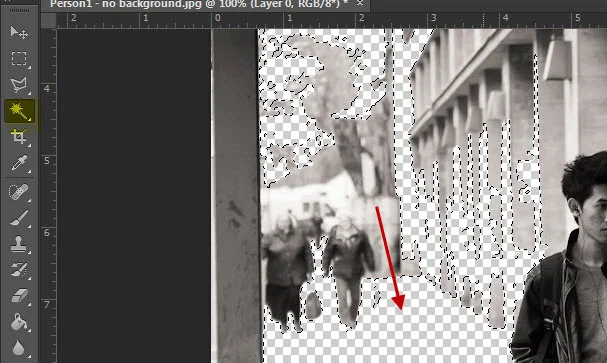
AE.8. Next, you can begin removing the background around your figure. Click on the Magic Wand. Then click on an area outside of the person. Press the Delete key. You will see a checkerboard appear. The checkerboard indicates that there is no background in that area. Repeat until the background is removed. You can also use the rectangular marquee tool to eliminate large areas of the background.
AE.9. Press Ctrl + D to remove the dashed marquee.
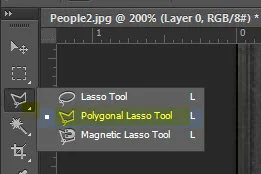
AE.10. If the Magic Wand or Rectangular Marquee is not allowing you to pick the desired areas to eliminate, try using the Polygonal Lasso or other area selection tools to outline an area to delete.
AE.11. You can use the eraser tool to remove areas as well.
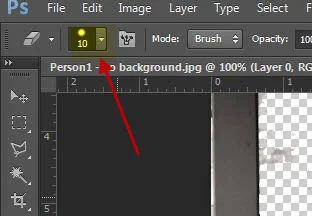
AE.12. To change the size of the eraser tool click on the arrow shown below.
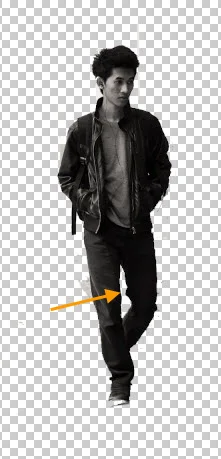
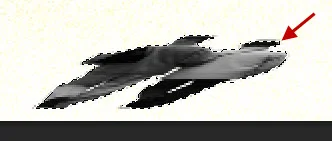
AE.13. Completely remove the background including areas inside the figure (orange arrow). Save your file.
AE.14. Next you will be bringing the figure into your rendered image. Press Ctrl + A to select all. Press Ctrl + C to copy the figure to the clipboard. Go to your rendered image file. It will be visible as a tab at the top of your screen unless you closed the file.
AE.15. Press Ctrl + V to paste the image in your rendering. Notice how a new layer has been created. The grayish/blue color indicates that the layer is the current layer.
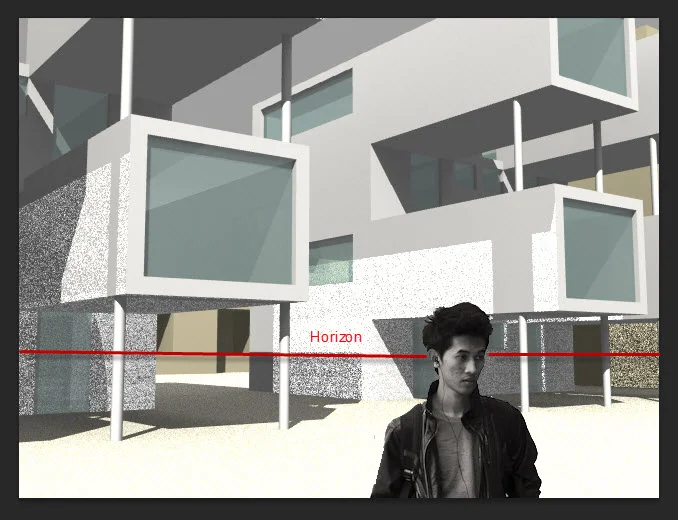
AE.16. The figure is now in the image, but the position of the figure needs adjustment. In an earlier step the Horizon was discussed. The relationship of figures to the horizon is important.
Scenario: I am photographing a building. The ground plane is flat. I am of average height, and the people in my photograph are also of average height. they are standing on the same ground plane. My view is horizontal. I am not tilting my camera upward or downward. If these conditions are true, then the eyes of the people in my image should all be on the same horizon line no matter how far they are from me.
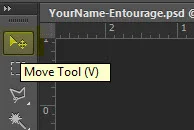
AE.16. Use the Move tool to move the figure.
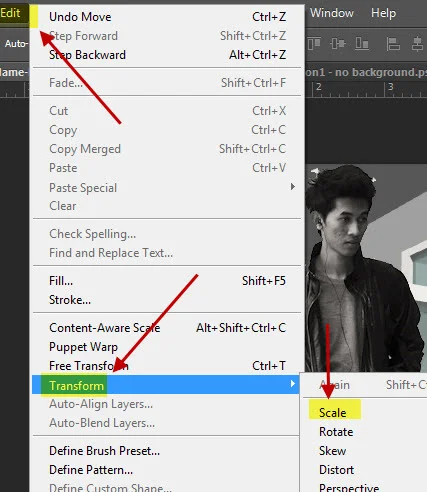
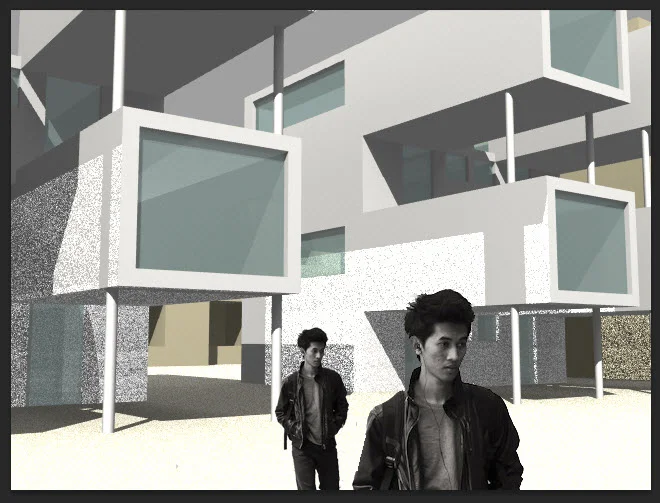
AE.17. As noted above the eyes of the figures will be at the same Horizon line. To illustrate this principle another figure has been brought into the file. Using the Edit>Transform>Scale and Move tools, the figure has been placed further into the image with his eyes on the same Horizon line. When scaling the object drag from a corner. Hold down the Shift key to constrain the horizontal and vertical proportions. Otherwise, the height to width ratio will be distorted.
AE.18. The image below further illustrates the principle.
AE.19. What if you would like to show a figure where the target is above the camera position? This a bit more challenging. To do this you need to find an image of a figure that is viewed from the same angle. Otherwise, the figures don't look right.
AE.20. The same applies if your camera is above the target position.
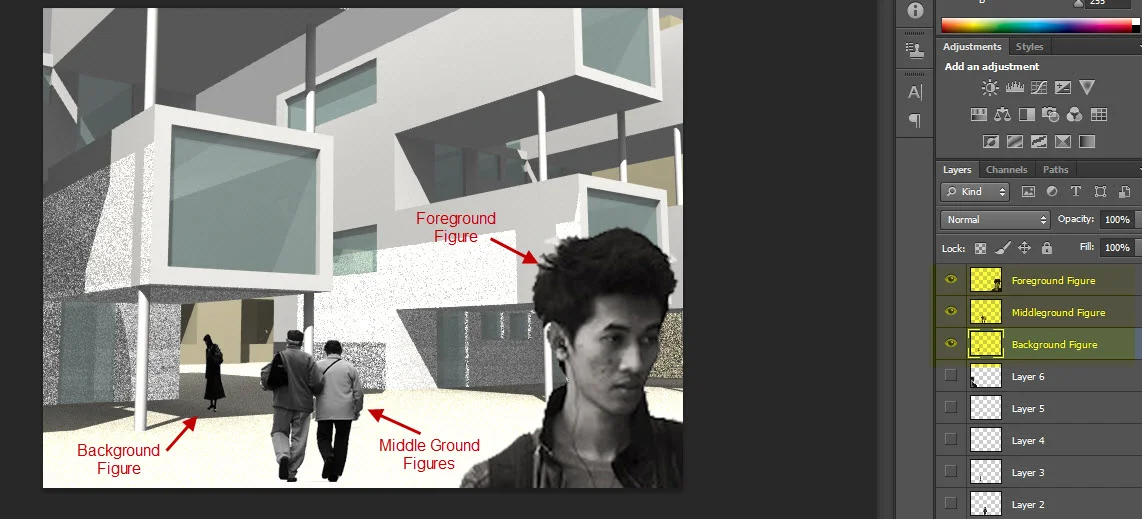
AE.21. Add at least three different figures to your image. One figure must be in the foreground, one in the middle ground and one in the background. The foreground figure must extend past the edges of the image. We must be able to see one of the figures touching a floor surface so that shadows can be shown.
AE22. A few things to keep in mind when you are working with layers...
You can edit the layer name if you like by right-clicking on the name and selecting Layer Properties. The layer that is a highlit with a blue-gray color is the current layer.
The layer at the bottom of the list is the back layer. You can move layers to the front or back by dragging them in the list.
AE.23. If you need to undo previous steps, 1.) click on the History tool, 2.) Choose the step you wish to undo, and 3.) click on the garbage can.
AE.24. Note that pressing Ctrl and the plus or minus symbol allows you to zoom in or out.Open on of your images in Photoshop.
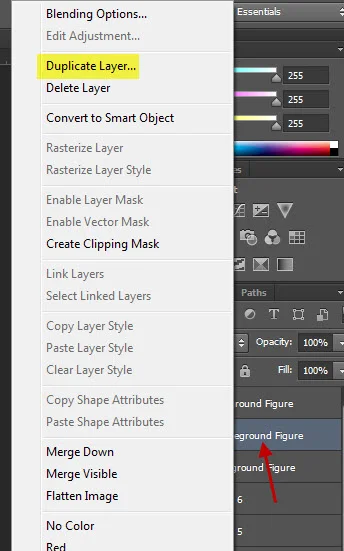
AE.25. Next, you will be adding shadows where your figures touch the ground. I will be adding shadows to my middle ground figures. Right-click on the layer that your figures are on, and select Duplicate Layer.
AE.26. Give your new layer a name that allows you to recognize it as a shadow for the figure.
AE.27. Make the new layer the current layer.
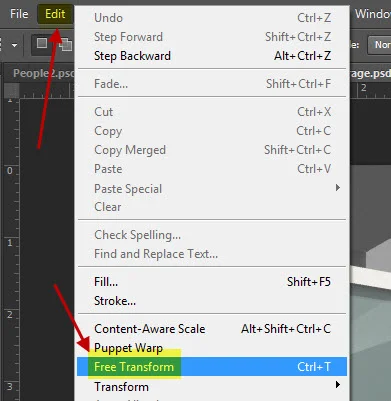
AE.28. Select Free Transform from the Edit menu.
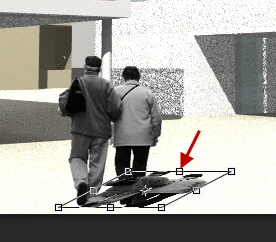
AE.29. Select the top middle grip, hold down the Ctrl key and drag the figure so that it corresponds with the shadows and the light source in your image. You can click in the middle of the stretched box to move the selection. Press Enter to confirm the change.
AE.30. Drag the shadow layer so that it is below the figure layer. This will place the shadow behind the figure.
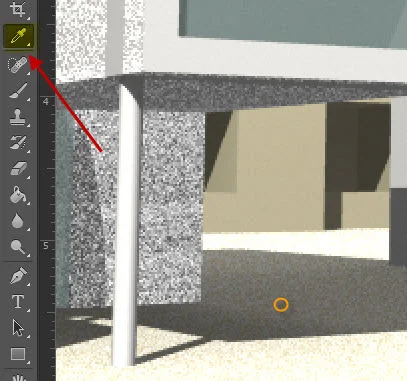
AE.31. Next, you will be altering the color/value of the shadow. Turn off the all layers except the background and the shadow layer. The idea is to isolate the shadow. In the image below, the contrast is very high between the shadow and surrounding area. The Magic Want was used to select the surrounding area. The orange circle is one point that could was selected.
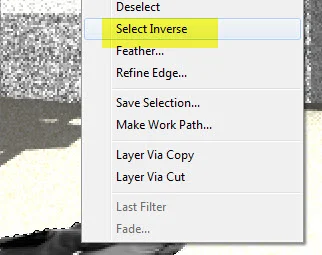
AE.32. Then right-click and click on Select Inverse to make the selected area the shadow area instead of the surrounding area.
AE.33. Now the selection set includes only the shadow figure.
AE.34. While the marquee (dashed, blinking line) still appears, click on the Eyedropper tool and then select an area of one of your shadows to match (orange circle).
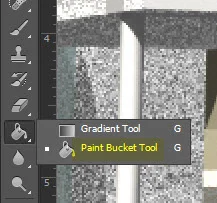
AE.34. Click on the Paint Bucket Tool.
AE.35. Then click in the area of your new shadow. You may need to click multiple times. Once the area is filled press Ctrl + D to deselect. Turn on the figure layer.
AE.36. You may find this video helpful: Photoshop Tutorial: How to Cast Realistic Shadows.
AE.37. Add shadows to all figures that would cast shadows.
AE.38. Save the file.
AE.39. Also save the file as a jpg image. If you are in the SaveAs window, you can change the file type by selecting JPEG from the Format options. Name the file with your name followed by _Entourage. Choose the highest settings for your image file.
AE.40. Upload both the psd file and the jpg file to your Google Drive folder.
.
.
,

