CCC Architecture
Programs in Architectural Studies at the City Colleges of Chicago
Algorithm Exercise
“Algorithms are step-by-step instructions for producing or accomplishing something. Like a recipe that transforms basic ingredients into a cake, an algorithm is a rules-based systems that receives inputs, performs steps, and produces outputs. We learn and use certain algorithms all the time - for instance, the method for performing long division. However, instead of performing arithmetic, we will develop our own simply algorithms that input, transform, and output geometric information such as points and curves.”
- from Digital Design Exercises for Architecture Students, p. 23 -
In this exercise you will work with algorithms to generate geometric compositions. You will also learn some commands and operations for editing objects. The algorithms will: start with a square, produce a copy of the square in the same position, rotate the square about a fixed point, and alter the scale of the square relative to the same point.
A.0. Make a new file by making a copy of your titleblock. Name the file with your last name followed by your first name followed by AlgorithmExercise. Jack Hill would name his file JackHill_AlgorithmExercise.
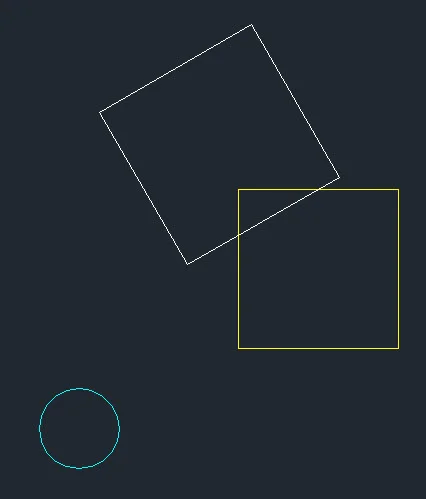
A.1. In model space and on layer 0 start with a circle having a radius of .25. The circle can be located anywhere in model space. The circle will be your reference or base point for all operations.
A.2. Next draw a 1 x 1 square. Locate the lower left corner 1.0 horizontally and 0.5 units vertically from the center of the circle. In the images below the square is shown in yellow and the circle in cyan, but you can leave yours white. All three patterns will start from this same relationship between a circle and square.

A.3. Make sure that your Center object snap is turned on.
A.4. Make a copy of the square suing the COPY command. You will be asked for a base point and a second point. Those points can be any point, but they must be exactly the same. The point could be the center of the circle or the same corner of the square.
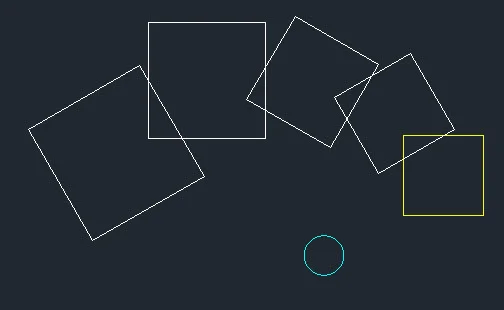
A.5. Rotate the square using the ROTATE command. The base point of the rotation will be the center of the circle. The rotation angle will be 30 degrees.
A.6. Increase the size of the square by 110%. Use the SCALE command to perform this operation. The base point will be the center of the circle. The scale factor will be 1.1.
A.7. Repeat the COPY, ROTATE and SCALE operations five times.
A.8. Complete two more algorithm patterns as shown in the center and right figures below. In both instances start with the same relationship of the circle and square.
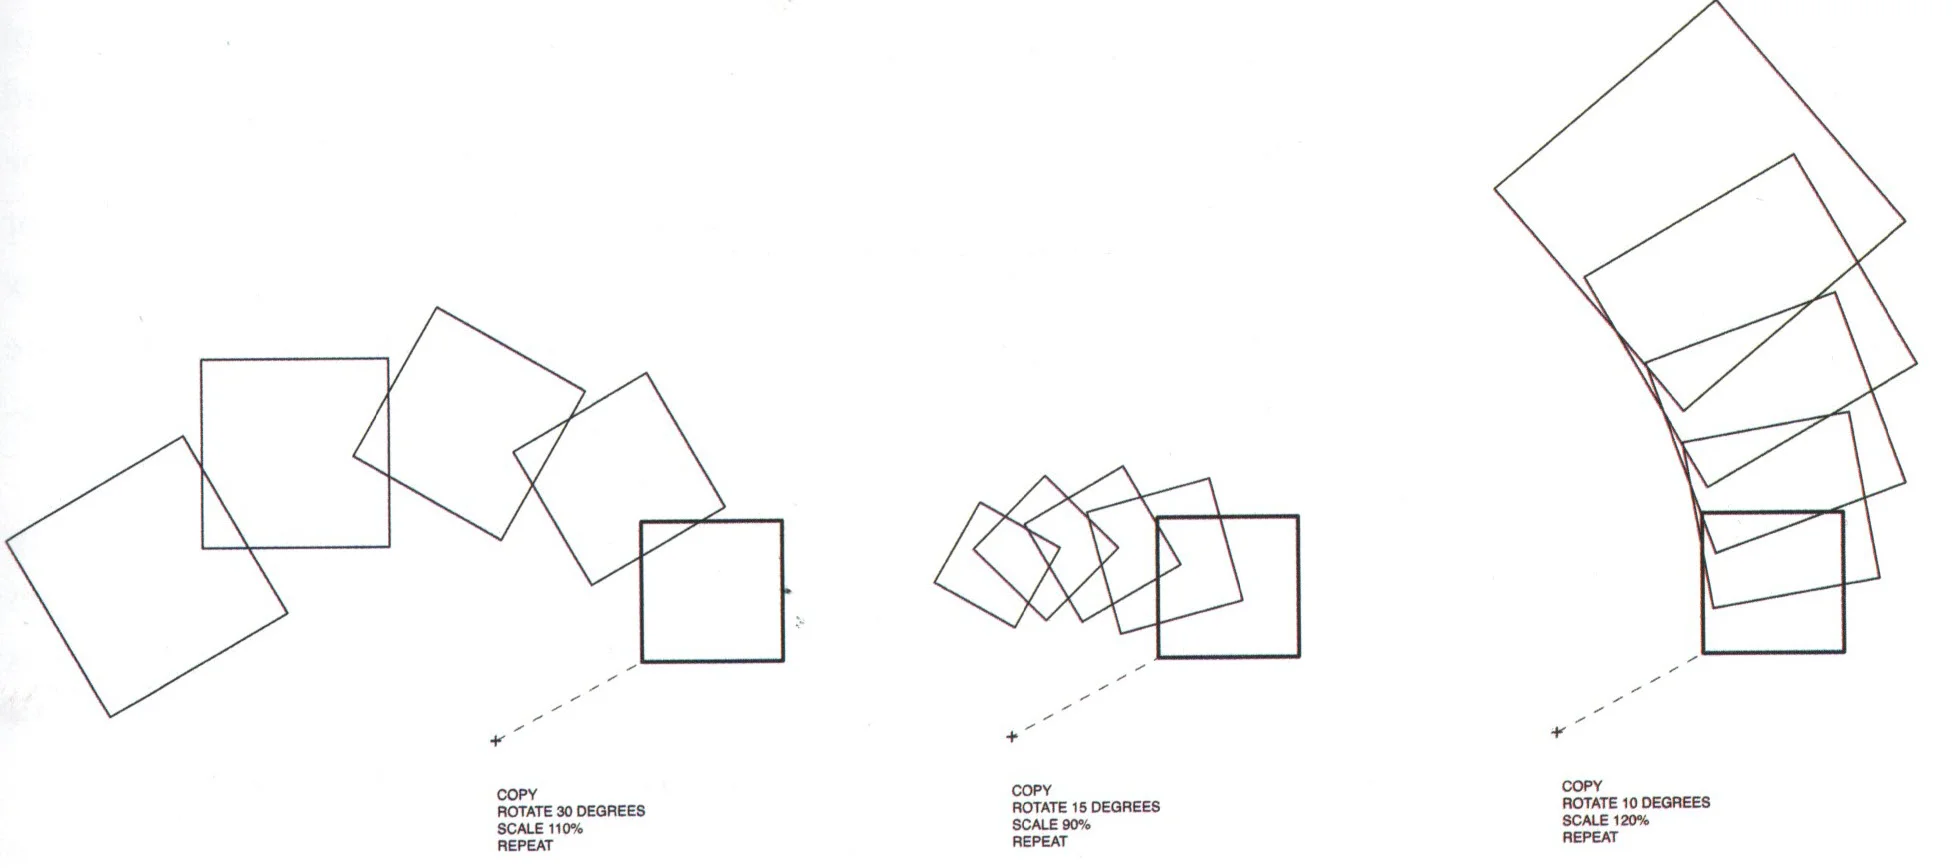
Image from Digital Design Exercises for Architecture Students, p. 23.
A.9. Choose one of the patterns (it doesn’t matter which one). Repeat the operations five more times.
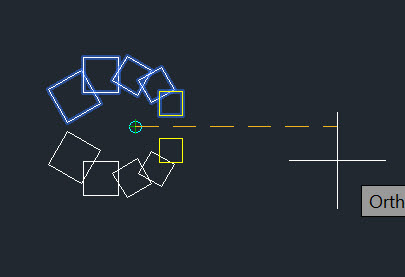
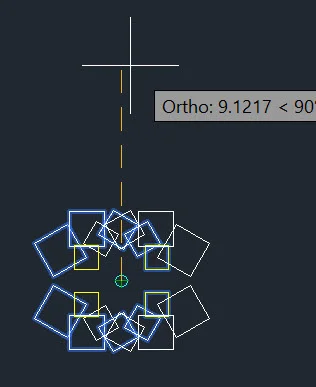
A.10. Make sure that Ortho is on. Choose one of the other two algorithm patterns to mirror about a horizontal and vertical access. Use the MIRROR command. Choose the five squares. When asked for the first point of the mirror line, select the center of the circle. When asked for the second point select a point to the left or right of the circle (Ortho must be on). When asked if you would like to erase the source object, Select No.
A.11. Repeat, but this time make a vertical mirror line.
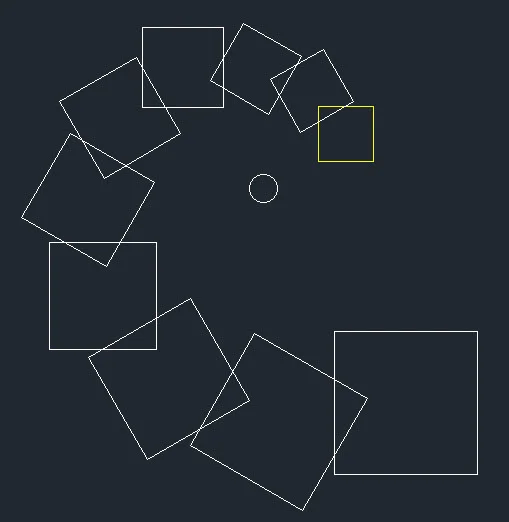
A.12. For the remaining pattern produce a polar array where the center of the array is the center of the circle. The number of repeats is your choice.

A.13. Go to Layout view. Double-click in the viewport and zoom to one of the patterns.
A.14. While you are in the viewport, turn off the grid in the background by typing Grid at the command line and choosing Off.
A.15. Zoom so that the patterns fills the viewport window. For the figure that you did five more operations, try to center the figure as well as you can. The mirror and polar array figures should be centered precisely. Use the Zoom command and select the Center option.

A.16. You will be asked for the center, but your object snaps may not work. Type 'cen' when you are asked for the center. Move your cursor to the center circle. You will see a green circle which indicates the center of the circle.
A.17. Change the tile on your sheet to Algorithm 1. Rename your layout tab to Algorithm 1 by right-clicking on it.
A.18. Make two more copies of the layout by right-clicking on it. Rename the titles on the layout tabs to Algorithm 2 and Algorithm 3
A.19. Make a pdf of the layouts using ccc.ctb. Name your pdfs with your name followed by Algorithm 1, Algorithm2 and Algorithm3.
P.1.16. Save and close your Autocad file. Upload the Autocad file and the three pdfs to your Google Drive folder.

.
.