CCC Architecture
Programs in Architectural Studies at the City Colleges of Chicago
Indesign: Single-sided Document
In this assignment you will be using InDesign to make a summary document of your project.
ISD.1. Open InDesign.


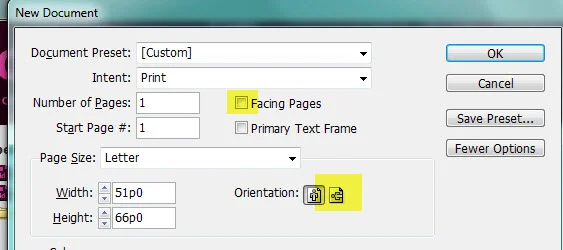
ISD.2. Create a new document. Uncheck the Facing Pages box. This will allow you to make a single-sided document so you can pin-up the sheets. Set your document to Landscape orientation.

ISD.3. Create a folder on your desktop or portable device. Save the file in the folder. Name the file with your name followed by Sculpture Garden Project.
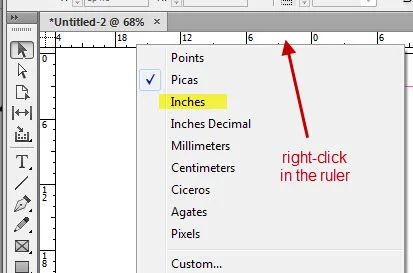
ISD.4. Change the units to inches by right-clicking on the ruler and selecting Inches. Change the units on the horizontal and vertical rulers.
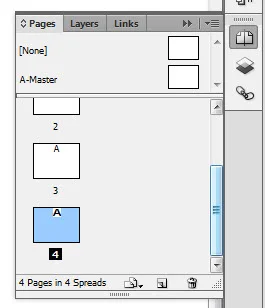
ISD.1. Create three new pages.
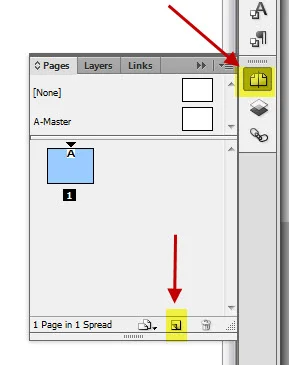
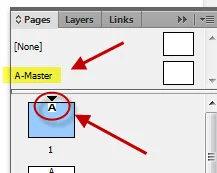
ISD.5. Indesign allows you to apply template settings to the pages of your document. The A that appears on each page indicates that the A-Master has been applied to the new page. This means that any change you make to the A-Master page will be applied to each page.
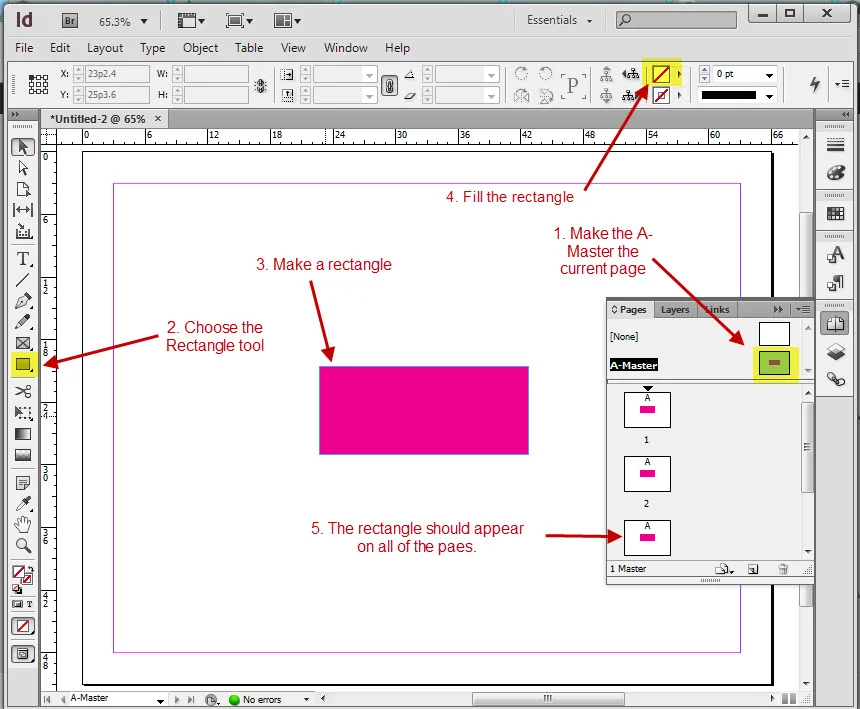
ISD.6. To test this, make the A-Master page the current page by clicking on it. Then make an object. In the image below a rectangle was made and filled with a color. As you can see on the pages, the rectangle appears on all of them. You can erase the rectangle from the A-Master page.
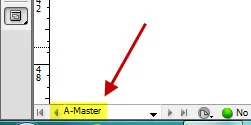
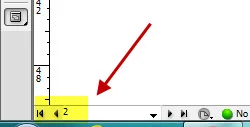
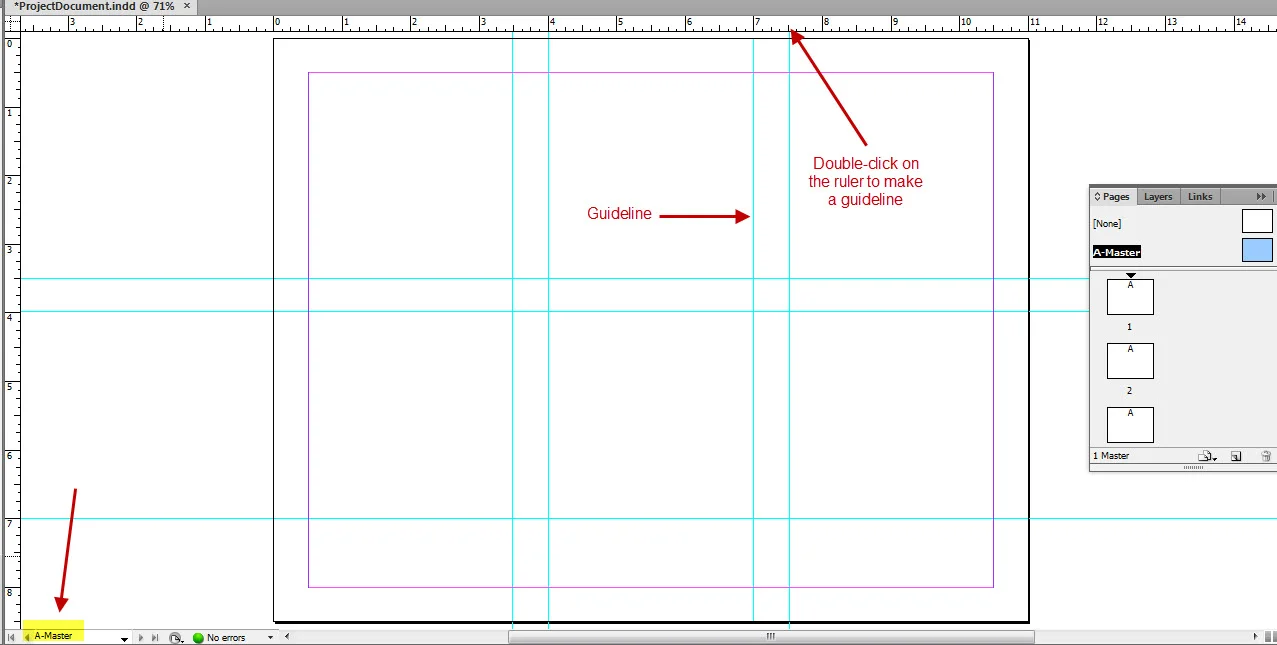
ISD.7. Please note that page with the blue highlight in the Page penal is the page selected, but to go to that page, you must double-click on the page. To determine what page your are on, look in the lower left corner of the string.
ISD.1. In the image below the current page is page 2.
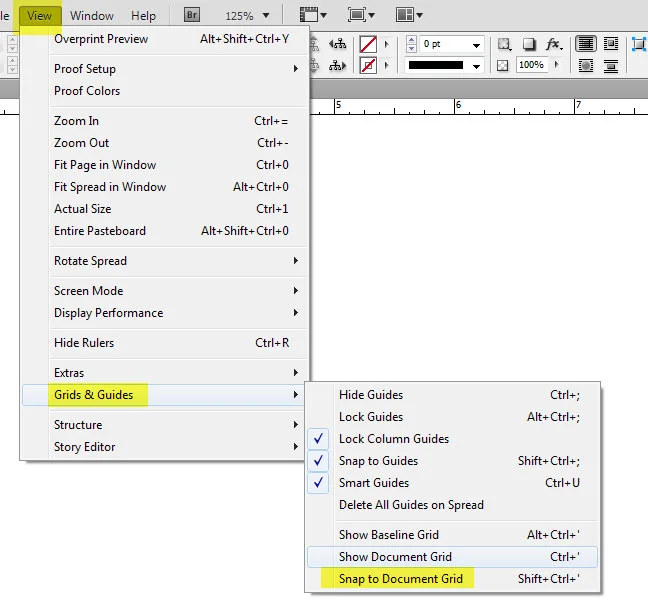
ISD.8. Turn on the Snap to Document Grid for the document. This will allow you to be more precise. The default number of divisions per inch is 8. If you want to change the number of divisions go to Edit > Preferences (at the bottom of the menu) > and select Grid. Change the number of vertical and horizontal divisions as necessary.
SD.9. As with Photoshop and Illustrator, pressing Ctrl and + simulatenously allows you to zoom in. Pressing Ctrl and - simultaneously allows you to zoom out.
ISD.10. What kinds of content do you put on a master page versus a page in the spread? Basically, anything that you want to appear on several pages should be on the master page. That includes page numbers, guide lines and recurring graphics. On the individual pages of your spread you should include items that appear only once in your document.
ISD.11. Return to your A-Master page and add guidelines to your document. Double-click on the ruler to add guidelines. Since these guidelines are created in the master, they will appear on all sheets. The image below shows 3" x 3" squares and a band at the bottom for text. You can use this grid or make your own.
ISD.12. When you go to the individual pages by double-clicking on them, you should notice that the guide lines appear.
ISD.13. Download the following images and put them in the same folder as your InDesign file.
- Site analysis including photographs and drawings
- The original pattern used to organize your project
- The simplified and analytical drawings of your pattern
- Schematic plans of your project (there should be at least 3)
- Photographs of your model (minimum of 5)
- Large-scale, rendered plans and sections of your project
ISD.1. Consider how you will arrange your images. You need to use a minimum of 4 pages.
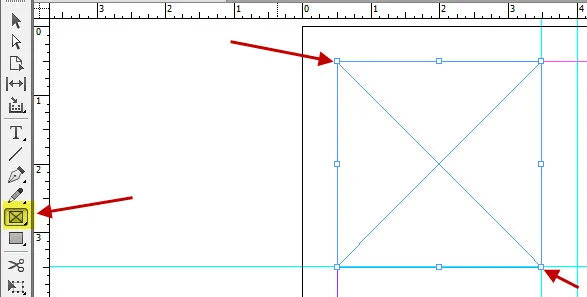
ISD.1. Before bringing an image into your file, create a frame.
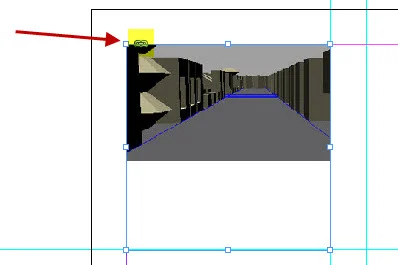
ISD.14. Next open the folder where your images are located and drag an image to the frame. The symbol in the upper left of the image indicates that the images is linked to the InDesign file. This means that it is not embedded. If you make a change to the image in your folder, it can be updated without inserting it again. It also means that you need to keep the image file in the same folder as the InDesign file for it to be visible and printable.
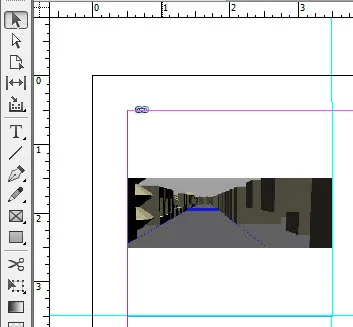
ISD.1. To change the size of your image, right-click on it and under the Fitting options
ISD.15. You may need to adjust the size of the image..
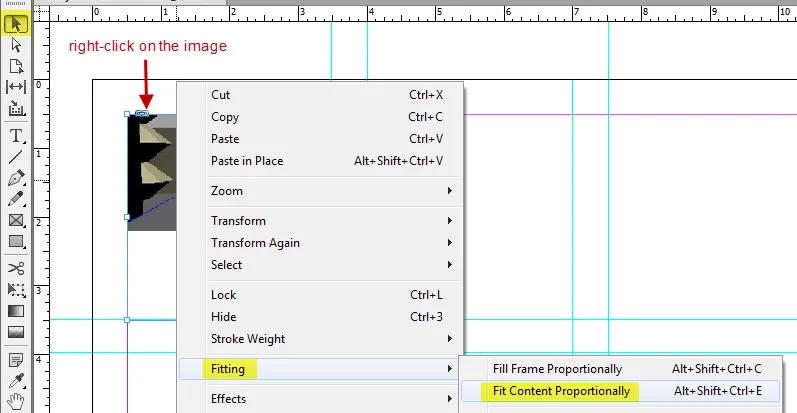
ISD.16. The image below as been adjusted. You may find other Fitting objects work better for your images.
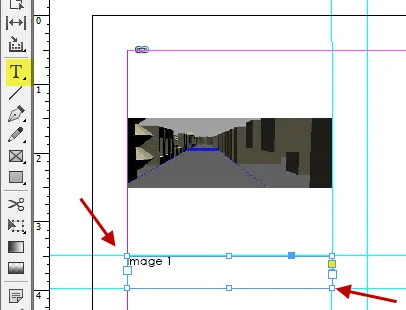
ISD.17. Add text below your image. A simple sans serif font is recommended having a font of no more than 12-pt. Be consistent with the placement and justification of your text. Text should be relative to the image or the grid. Either describe the images below the image or add a keynote number and described them in a text band at the bottom of the page (or elsewhere if you prefer). Descriptions/titles should be brief and grammatically correct.
ISD.18. Save your file and print it to pdf. The pdf should have the same name as the InDesign file.
ISD.19. Create a folder in your Google Drive. in the main folder for the class. Upload the InDesign file, the pdf and all of the image files to that folder.
ISD.20. Print your pdf in color.
.
.
.