CCC Architecture
Programs in Architectural Studies at the City Colleges of Chicago
Non-Annotative Blocks
Description
Blocks are groups of objects that can be inserted into your file. They are frequently used for objects that are repeated. If you make a block, you can insert it as many times as necessary.
There are different types of blocks. Some are graphic symbols. They are drawn the size they would appear on the printed sheet. When those types of blocks are inserted, they are scaled according to the scale that the drawing will be printed. Those types of blocks are annotative (more on this later). Others are drawn to their full scale. A chair for example, is drawn to its full size. In this exercise, you will be drawing this second type of block.
Objectives/Outcomes and Assessment Criteria
Students will acquire and demonstrate: 1.) technical competency in working with block creation, 2.) sense of craft through precision and care in the presentation of the work, 3.) design aptitude in the ability to solve an graphic and operational problem, 4.) judgment in the choice of object and attention to detail 5.) consideration of limitations and constraints in the problem solving process.
Steps
B.1. Students from past semesters have been drawing furniture blocks. The blocks have been uploaded to a folder so they can be shared. Go to the Block Folder to see the list of blocks that have already been made. You will also be asked to make furniture blocks so they can be shared.
B.2. Go to Design Within Reach online catalog. Find a piece of furniture to draw that has not already been drawn. You will just be drawing a top, side and front view.
B.3. No need to use your titleblock file for this one. Just start a new file in AutoCAD using the acad template. Name the file with your name followed by Non-AnnotativeBlocks.
B.4. Set your current layer to 0. Construct your furniture off to the side in your file. Use the dimensions provided in the catalog.
B.5. Wblock each view of the piece of furniture separately to its own file. Type in W to initiate the Wblock command. Wblock is short for Write Block. This command will export a selection to a new file. The Write Block window will open. Click on the Select Objects icon.
1.) In model space, make a window around the top view and then Press Enter.
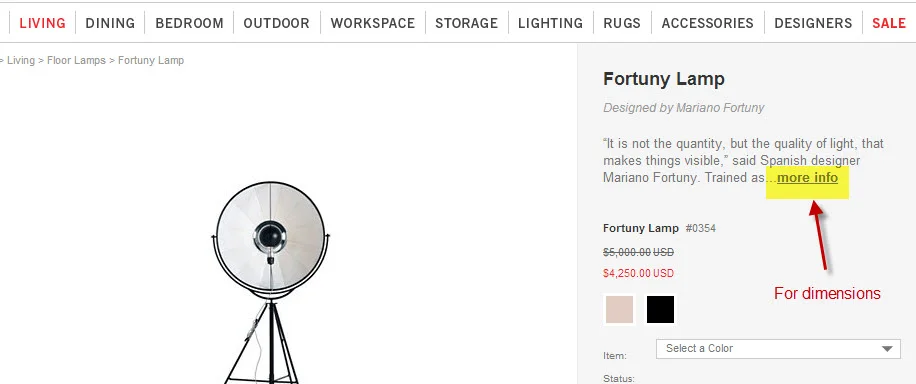
2.) Type in the name under File name and path. Name the wblock with your name followed by the type of object you have drawn, the name of the piece of furniture, and side or front. If Samuel Willard had drawn the lamp above he would name the block SamuelWillard_Lamp_Fortuny_Front.
3.) Click on the button to the right of the file name and browse to the place on your computer where you are storing your files.
4.) Click on the Pick point icon. This will establish the insertion point of your block. It is important that the pick point (insertion point) is carefully located. For the top view, the pick point should be the center, middle of one side, or corner of the object. For the front and side views, the best place would be where the object meets the ground at a corner or middle.

B.6. Upload the file where you drew the three views and the three blocks of the furniture that you drew from the Design Within Reach catalog to your Google Drive folder.

.
.
.