CCC Architecture
Programs in Architectural Studies at the City Colleges of Chicago
Pattern Exercise 3
For this exercise you will be creating another pattern. You will be adding content to a file you created previously. The pattern will be cut out of a piece of thick paper using the vinyl cutter. The general steps are similar to the previous patterns that you made. You make the smallest repeating unit of your pattern inside a square, and then you array the block.
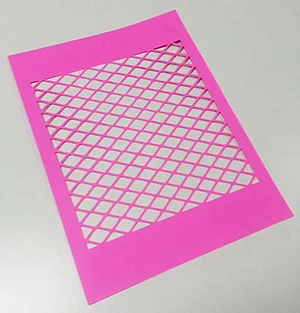
H.Stalska_Pattern printed with the vinyl cutter
Objectives/Outcomes and Assessment Criteria
Students will acquire and demonstrate: 1.) technical competency in working with basic drawing tools and arrays, 2.) sense of craft through precision and care in the presentation of the work, 3.) design aptitude in the ability to solve an organization problem and explore possible solutions, 4.) judgment in the composition of objects within a field. 5.) consideration of limitations and constraints in the problem solving process.
Steps
P.2.1. Make a copy of your Titleblock Exercise and name the new file with your name followed by PatternExercise3.
P.2.2. Create the following layers
Non-print, any color, click on the printer icon so the layer does not print.
Pattern, blue (5)
P.2.3. On layer Non-print draw a square that is 1 unit x 1 unit. Then change your current layer to Pattern.
P.2.4. Design a pattern that meets the following criteria:
All forms must be closed shapes.
No lines in your pattern can cross other lines.
There can be no shapes inside other shapes.
The design must be your design.
The following are examples not to be copied. The image below shows some patterns that won't work for this exercise and some patterns that would work.

A shape can be completed in the adjacent square as shown in the images below. The image shows a rectangle, but the concept would work for a square as well.
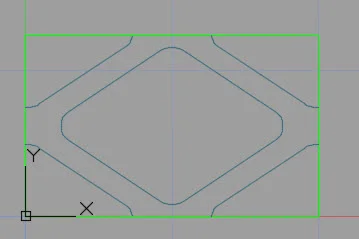
H.Stalska_Smallest repeating unit

P.2.5. Make an array of your block with 7 rows and columns.
P.2.6. Prepare the pattern so it can be cut with the vinyl cutter. Explode the array. Explode the individual blocks. Trim lines that extend beyond the square.
P.2.7. Set the current layer to the layer of your pattern. Turn off the non-print layer. Close all open shapes at the edges. The red arrow below points to one of the lines that had to be added. All shapes must be closed as shown in the image below.

P.2.9. Create a pdf. Name the file with your name followed by Pattern 3.
P.2.10. There are a few steps need to prepare the pattern for the vinyl cutter. In preparation for printing. First, you will need to make a new file that has just the pattern in it. We'll do this by make a wblock of the pattern. In model space type Wblock at the commd line. Click on Select Objects, make a window around the pattern. Click on the button next to the File name and path. Direct the file to your usb drive or desktop. Name the file with your name followed by Pattern3.

P.2.11. Save your file, and close it.
P.2.12. Open the new file that you just made. In model space type Explode at the command line and make a window out of your pattern. Check to see that all of objects are independent lines. You can determine this by passing your cursor over the objects. A hexagon, for example, should be a series of lines, not one objects. Repeat the Explode process if you find that there are joined components in your file.
A.2.13. Turn off the Pattern layer. Erase the Non-print layer. We must do this because the vinyl cutter will cut all lines. Turn the Pattern layer back on.
A2.14. Save your file.
A2.15. Save your files as a version 2000 dxf file with the same name.
A.2.16. Close your dxf. Do not allow it to save as a version 2018 file.
A2.17. Print your pattern using the vinyl cutter.
A.2.18. Scan your new pattern. Use the same name as the dwg file.
P.2.19. Upload the following to your Google Drive folders.
The dwg file
The dxf file
Scanned image of the pattern

.
.