CCC Architecture
Programs in Architectural Studies at the City Colleges of Chicago
Exercise: Table
Description
In this exercise you will drawing a table using 3D modeling tools.
Objectives/Outcomes and Assessment Criteria
Students will acquire and demonstrate:1.) technical competency in using software to solve a problem, 2.) sense of craft through precision and care in the presentation of the work, 3.) design aptitude in the ability to solve an object-oriented construct, 4.) judgment in the formal articulation of a three-dimensional object. 5.) consideration of limitations and constraints in the problem solving process.
Steps
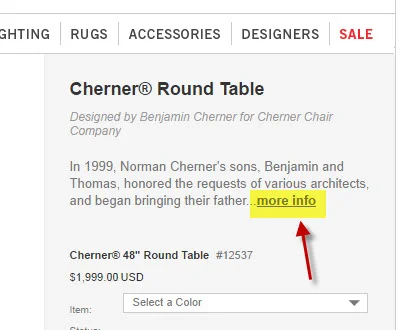
T.1. Go to the Dining Table page of on the Design Within Reach online catalog. Find a table to draw.
T.2. For Dimensional information click on More Info.
T.3. No need to use your titleblock file for this one. Just start a new file in AutoCAD using the acad template. Save the file and name it with your name followed by the name of the table as described on the Design Within Reach website. If Cole Porter were drawing the Arc En Ciel Folding Table, he would name his file ColePorter_ArcEnCielFoldingTable.
T.4. Create a layer for each material that your table has. Name the layers so that they represent the materials. Names might be Wood, Glass, Aluminum, etc.
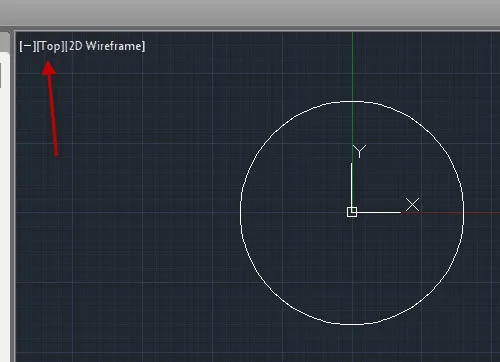
T.5. Keep in mind that when you view your table from the Top view, we should see the top of the table from above. The table can be rotated later to have the correct orientation, but it would be best to start from that orientation. In the image below a round table is shown from the top view.
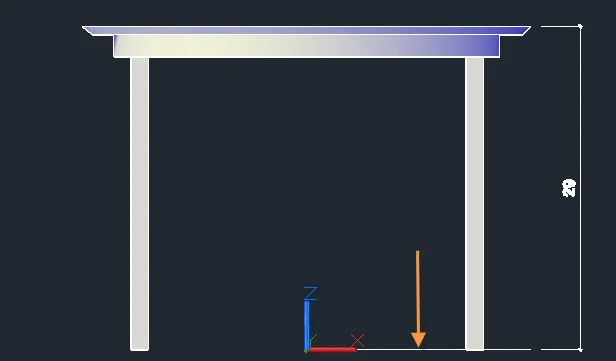
T.5. The table must be drawn so that the bottom of the legs sit at 0" along the Z-axis. In the image below, notice the relationship of the bottom of the table legs to the UCS icon. The image below is from the front view, but the UCS icon has been set to World. To do this go to a front or other side view, type UCS at the command line and select the World option.
T.6. There are many ways to construct objects in 3D and it will depend on the type of table that you plan to drawn. It is recommended that you discuss with the instructor the methods of 3D modeling that you plan to use.
T.7. If you have a simple table, you may be able to use primitive solids. More complex forms may require more advanced modeling techniques.
T.8. If you are drawing a round table, you may find the following video helpful.
T.9. If you are working with a table that has straight table legs, you may be able to use the primitive forms like Box and Cylinder, but if the leg has a profile or changes in shape, you may want to try the Loft command. The video below describes how the tool works.
T.10. If you are working with a table that has curved legs, you might try using the Sweep command. The video below describes how the tool works.
T.11. If these videos do not address the type of table you are drawing, ask for help!
T.12. When you have completed your table, save and close the file. Upload the file to your Google Drive folder.

.
.
.